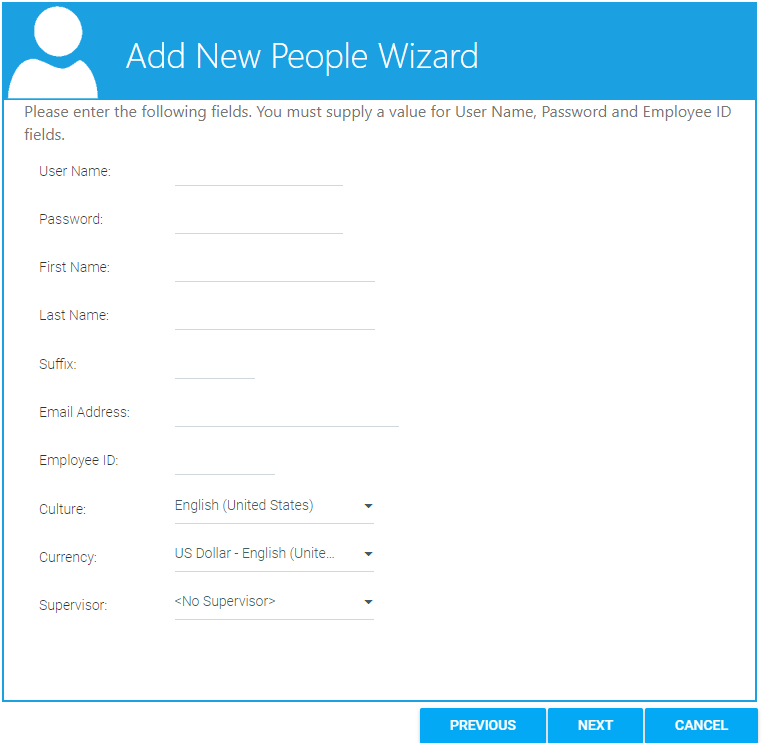
To create a new user, go to Wizards > Add New Person in the Navigation Bar of the Administrator's Console.
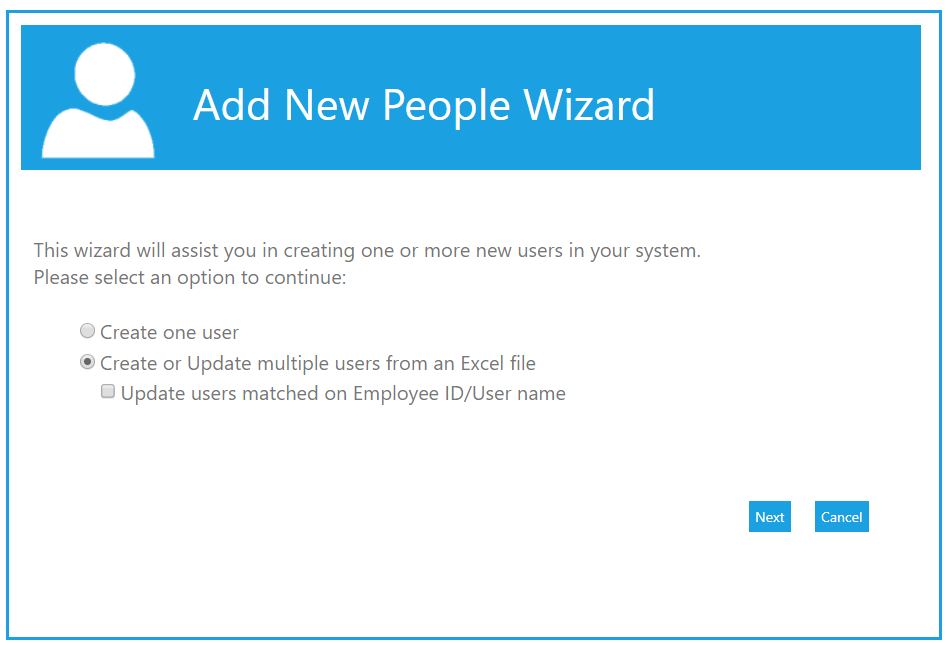
Select "Create one user".
There are two options for creating a single user:
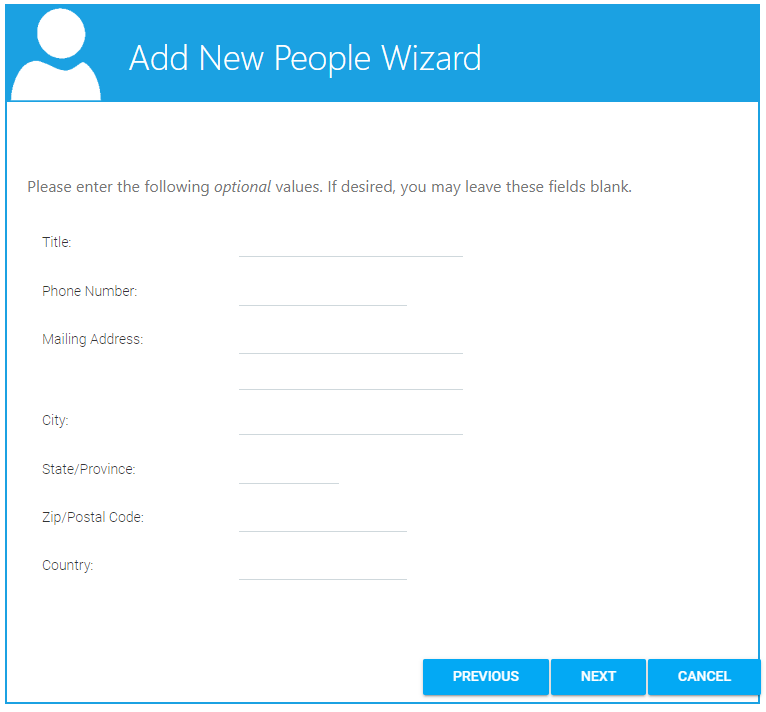
The fields on the following screen are all optional:
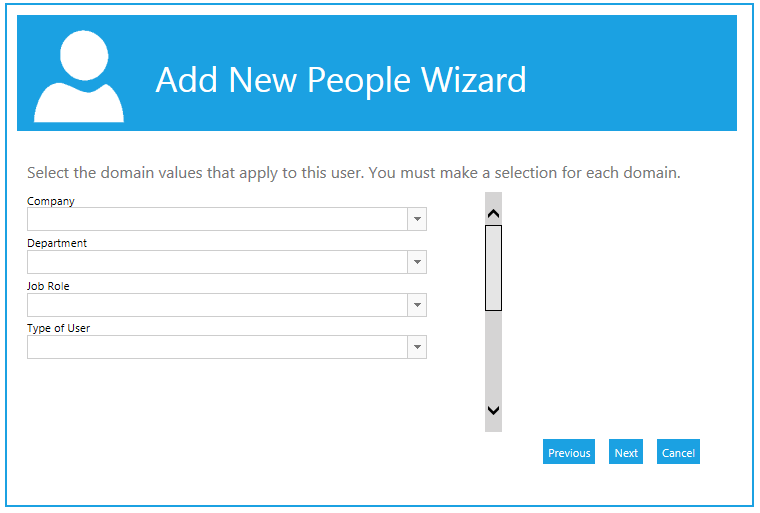
The final screen is for the domain values. The number and name of the domains listed will vary based on the specific requirements of your system, but all domain fields are required.
If this account is being created based on another user account, the LMS will pre-populate all of the domain information. All domain information can be changed as needed.
If a user is added to a parent domain level, they will not automatically be part of any child domain level(s).
Click the Next button to create the new user account and complete the process.
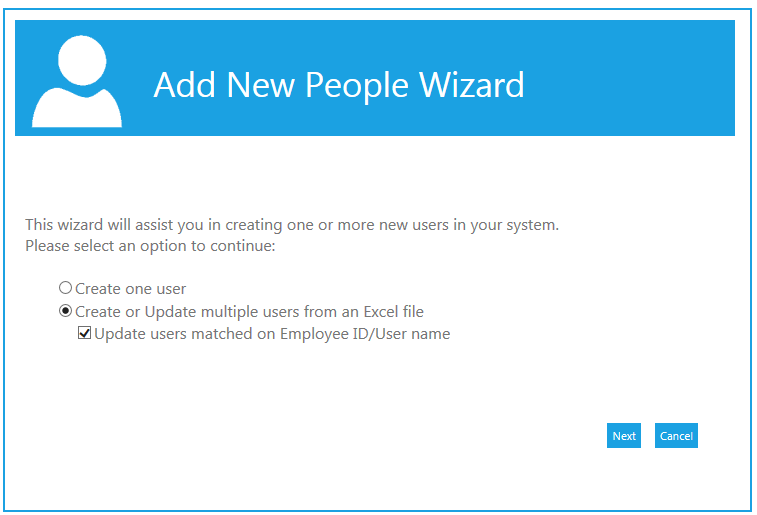
To create multiple new accounts at once, go to Wizards > Add New Person in the Navigation Bar of the Administrator's Console.
Select the second option, “Create or Update multiple users from an Excel file” and click the Next button.
Follow this same process to update existing users; however, you cannot create new users and update existing users at the same time.
Click the Generate Template button to download the template specific for your LMS.
Use the following information to complete the template:
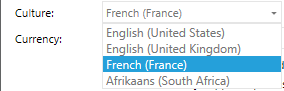
The culture entry must exactly match the full text in the culture description or the LMS will not recognize your entry. In the example shown below, “French (France)” would need to be entered into the spreadsheet.
To ensure that the domain information is correctly entered, you may want to run a report that includes the domain fields and just cut and paste the entire domain description from the report to your upload.
Once you have entered all of the information into the spreadsheet, copy all rows, including the header row, paste them directly into the LMS, and then click the Next button to continue.
The LMS will alert you to errors in your data. If there are errors, use the Previous button to go back and resubmit your data.
When you see the message "No errors found," click Next to continue.
The system will alert you that you are about to create new users and that this action cannot be reversed.
Click the Next button to complete the process, and click Finish or close the window to exit the wizard.
The Update Existing Users feature can be used to update domain data and information for users who are not part of a data feed. The spreadsheet can also be used to inactivate multiple users in at one time.
The wizard should only be used for users that are not part of an automated data feed. If changes are made to a user's profile through the wizard, but that user is also part of a data feed, the data feed will always overwrite the changes made through the wizard.
Select the option "Create or Update multiple users from an Excel file" and check the box to "Update users matched on Employee ID/ User Name."
On the Next screen, click the Generate Template button to download your system's unique template.
In the template you must enter the User Name and the Employee ID for each user that you are updating.
Paste the contents of the template, including the header row, directly into the LMS.
The LMS will alert you to errors in your data. If there are errors, use the Previous button to go back and resubmit your data.
When you see the message "No errors found," click Next to continue.
The system will alert you that you are about to changes and that this process cannot be reversed.
Click the Next button to complete the process, and click Finish or close the window to exit the wizard.